


 by
by Before you even think about learning how to change a flat tire, you need to master what to do in the first thirty seconds. That’s what keeps you safe, whether you’re a private driver, a taxi professional in London, or a recovery agent attending a call-out.
What to Do Immediately After Getting a Flat Tyre

It’s a sound every UK driver dreads—that rhythmic thump-thump-thump and the sudden, unnerving pull on your steering wheel. Whether you’re stuck in rush-hour Manchester traffic or cruising down a quiet country lane in England, a flat tyre demands a calm, immediate, and professional response.
Forget about the jack and the spare for a moment. Your first moves are all about safety. Getting this right turns a potential crisis into a manageable inconvenience, deciding the outcome of your journey. The priority is to secure the scene long before you touch a single lug nut.
Secure Your Vehicle and Yourself
The second you realise a tyre’s gone flat, fight the instinct to slam on the brakes. Grip the steering wheel firmly, ease your foot off the accelerator, and signal your intention to pull over. You’re looking for a safe harbour—a spot that’s both level and solid. A soft verge or a steep hill will make using a jack a dangerous, and potentially costly, gamble.
Aim for a lay-by, a quiet side street, or the hard shoulder if you’re on a motorway and there’s no other option. Once you’ve stopped, your car needs to be a clear warning to other drivers, especially on busy urban roads in places like Birmingham or Liverpool.
Here’s your immediate action plan:
- Flick on the Hazard Lights: This is your universal signal for trouble. Turn them on right away, even before you come to a full stop.
- Engage the Handbrake: Pull it up firmly to stop the car from rolling. If you drive an automatic, shift it into ‘Park’. For a manual, pop it into first gear or reverse.
- Deploy the Warning Triangle: This is a crucial step. In the UK, you should place a reflective warning triangle at least 45 metres (about 147 feet) behind your car, on the same side of the road. It gives other drivers in places like Newcastle plenty of time to see you and slow down.
Before you start any work, it’s vital to run through a quick safety check. The conditions on UK roads can change in an instant, and what seems safe one minute might not be the next.
Essential Safety Checklist Before You Start
This table is your quick-glance guide to making sure your workspace is secure. Don’t skip these steps—they’re designed to protect you from passing traffic and prevent your vehicle from moving unexpectedly.
| Safety Action | Why It’s Critical in the UK | How to Do It |
|---|---|---|
| Hazard Lights On | Your primary alert to other drivers in often poor visibility on UK roads. | Flick the switch with the triangle symbol on your dashboard. |
| Handbrake Engaged | Prevents the car from rolling, especially on slight inclines common in England. | Pull the lever up firmly or press the electronic parking brake button. |
| In Gear / ‘Park’ | Adds a second layer of protection against vehicle movement. | Manual: Select 1st or Reverse. Automatic: Select ‘P’ (Park). |
| Warning Triangle Placed | Legally required in many EU countries and vital for visibility on fast UK roads. | Place it at least 45 metres behind your vehicle on the same side. |
| Wear a Hi-Vis Vest | Makes you visible to other motorists, especially at night or in bad weather. | Keep one in your glove box or boot and put it on before exiting the car. |
| Check for Stable Ground | A jack can sink into soft ground or slip on uneven surfaces. | Ensure you’re on tarmac, concrete, or firm, level gravel. Avoid grass verges. |
Taking a minute to complete this checklist is the most important part of the entire process. Once you’re confident the scene is secure, you can move on to assessing the situation.
Assess the Situation
With the car secured, take a proper look around. Are you on a blind corner? Is it getting dark, or is rain making the road slick and visibility poor? Being stranded on the roadside near fast-moving traffic in cities like Liverpool or Newcastle can be incredibly dangerous.
If you feel unsafe for any reason—the location, the weather, or just a gut feeling—calling for professional help is the only right decision.
Your personal safety is worth more than any tyre. If the road feels too busy or you’re on a major A-road without a proper hard shoulder, don’t take the risk. This is the exact moment to decide, not just explain your problem to yourself. Open the Crisfix app and get a professional to your location, worry-free.
Getting to Grips With Your Tyre Changing Kit
Before you can even think about how to change a flat tyre, you need to know what tools you’re working with. Every car comes with a kit for exactly this situation, but finding it isn’t always straightforward.
In most UK cars, it’s tucked away under the floor of the boot, usually right next to the spare tyre. Simple. But in some models, especially larger estates or SUVs, the manufacturer might have stashed it in a side compartment or even under a passenger seat. The best advice? Check your owner’s manual now, before you’re stuck on the side of a wet road in Manchester. It’ll show you exactly where everything is and what it does.
Once you’ve found the kit, you’ll typically find a few essential items:
- The Jack: This is what lifts the car. Most standard kits have a scissor jack, which you raise and lower by turning a long screw.
- The Lug Wrench: An L-shaped or cross-shaped spanner designed specifically for loosening and tightening the nuts that hold your wheel on.
- Locking Wheel Nut Key: If your wheels have security nuts, this special adapter is absolutely essential. It’s often in its own little case, sometimes in the glove box.
- Wheel Chocks (optional): Some kits include these little wedges to stop the car from rolling. If yours doesn’t, a couple of bricks or sturdy blocks of wood work just as well.
Finding the Right Spot: Locating the Jacking Points
This bit is non-negotiable. Get it wrong, and you can cause serious, expensive damage to your car. You can’t just place the jack anywhere. You need to use the dedicated jacking points—reinforced areas of the car’s frame built to handle the weight.
These are almost always found on the pinch weld, which is the metal seam running along the bottom of the car, between the front and back wheels. Look closely and you should see a small arrow or a couple of indentations showing you exactly where the jack needs to go. Your owner’s manual will have a clear diagram, so have a look.
Never, ever place the jack under the plastic body panels, the engine’s oil pan, or the differential. These parts aren’t designed to take the weight and will crack or break. It’s a rookie mistake that can cost you hundreds to fix.
The Dreaded Locking Wheel Nut
Here’s a common problem that brings many a roadside repair to a grinding halt: the locking wheel nut. It’s a great anti-theft feature, right up until the moment you can’t find the key. This small, unique socket is the only thing that will remove that one special nut on each wheel.
Make it a priority to know exactly where yours is. Check the glove box, the centre console, or with the rest of the tyre kit in the boot. If you can’t find it, your DIY job is over before it’s even started.
This is a classic situation where deciding to call in the professionals is your only real option. If you’re stuck, our guide to mobile tyre fitting explains how a specialist can sort this exact problem out for you, right where you are.
Changing the Tyre: A Practical Walkthrough
Right, your car is secured, and you’ve got your tools laid out. This is the moment of truth. Learning how to change a flat tyre is a core skill that’ll save you a world of hassle, whether you’re on a quiet lane in England or the M62. Don’t worry about getting it perfect first time; just follow these steps logically, and you’ll be fine.
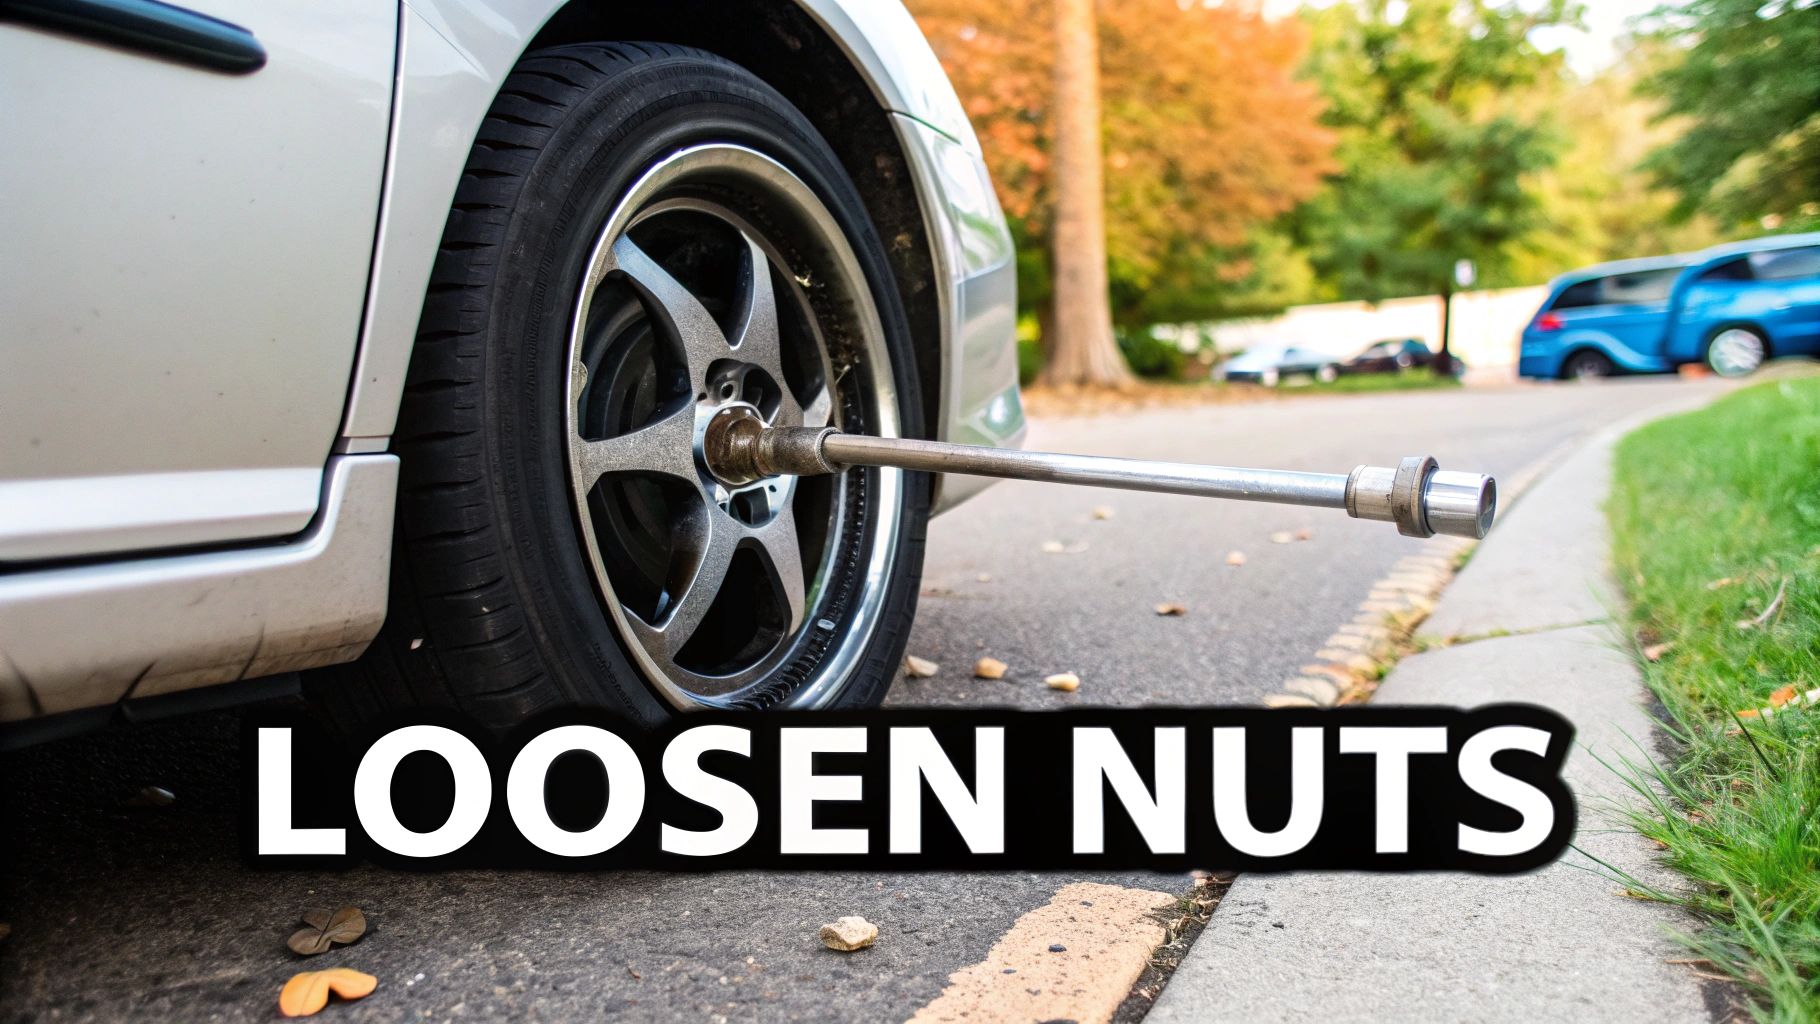
The very first thing you need to do happens before you even think about lifting the car. While the flat tyre is still firmly on the ground, grab your lug wrench and ‘crack’ the lug nuts loose. Get the wrench snug on a nut and turn it anti-clockwise. They can be incredibly tight, so you might need to use your body weight. A steady, firm push is much better and safer than sharp, jerky movements.
Just give each one a half-turn or so. You’re not taking them off yet, just breaking that initial seal. Doing this now, while the car’s weight is on the wheel, stops it from spinning uselessly in the air. Trust me, it saves a lot of swearing later.
Safely Raising the Vehicle
Now it’s time for the jack. You’ll need to place it under the car at a specific, reinforced spot near the flat tyre. Your owner’s manual will show you exactly where this is—it’s usually a small notch or mark on the car’s frame.
Once you’ve got it positioned correctly on a solid, flat bit of ground, start turning the handle or pumping the lever. You’ll see the car begin to lift. Watch the jack closely to make sure it stays straight and stable. You only need to raise the car enough for the flat tyre to spin freely, with a little daylight between it and the road.
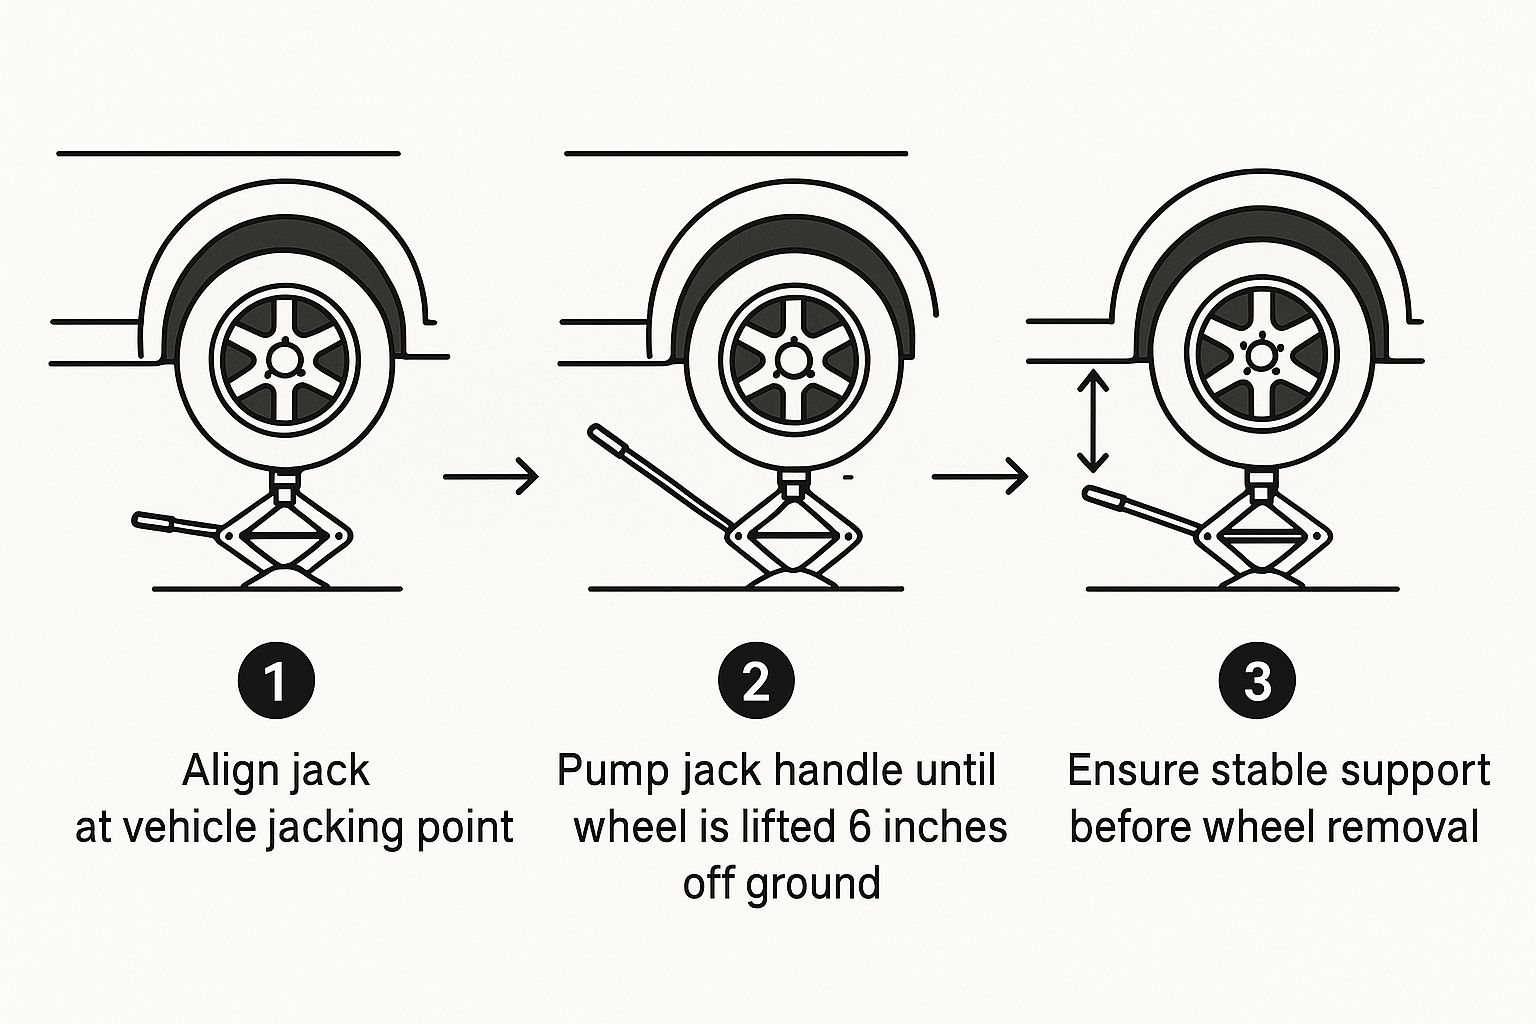
As the infographic shows, lifting the car isn’t about brute force. It’s a precise job. Getting the jack aligned perfectly, lifting just high enough, and making sure everything is stable are absolute must-dos for safety.
Removing the Flat and Mounting the Spare
With the car safely in the air, you can finish unscrewing the lug nuts you loosened earlier. As you take them off, pop them somewhere safe—the upturned hubcap or a pocket works well. The last thing you want is a nut rolling away under the car.
Grip the flat tyre with both hands and pull it straight off the hub. It’ll be heavier than you think, so bend your knees to save your back. Here’s a great pro tip: slide the flat tyre flat on the ground and push it under the car, right next to the jack. This is a simple but brilliant safety precaution. If the jack were to fail, the car would drop onto the old wheel, not you.
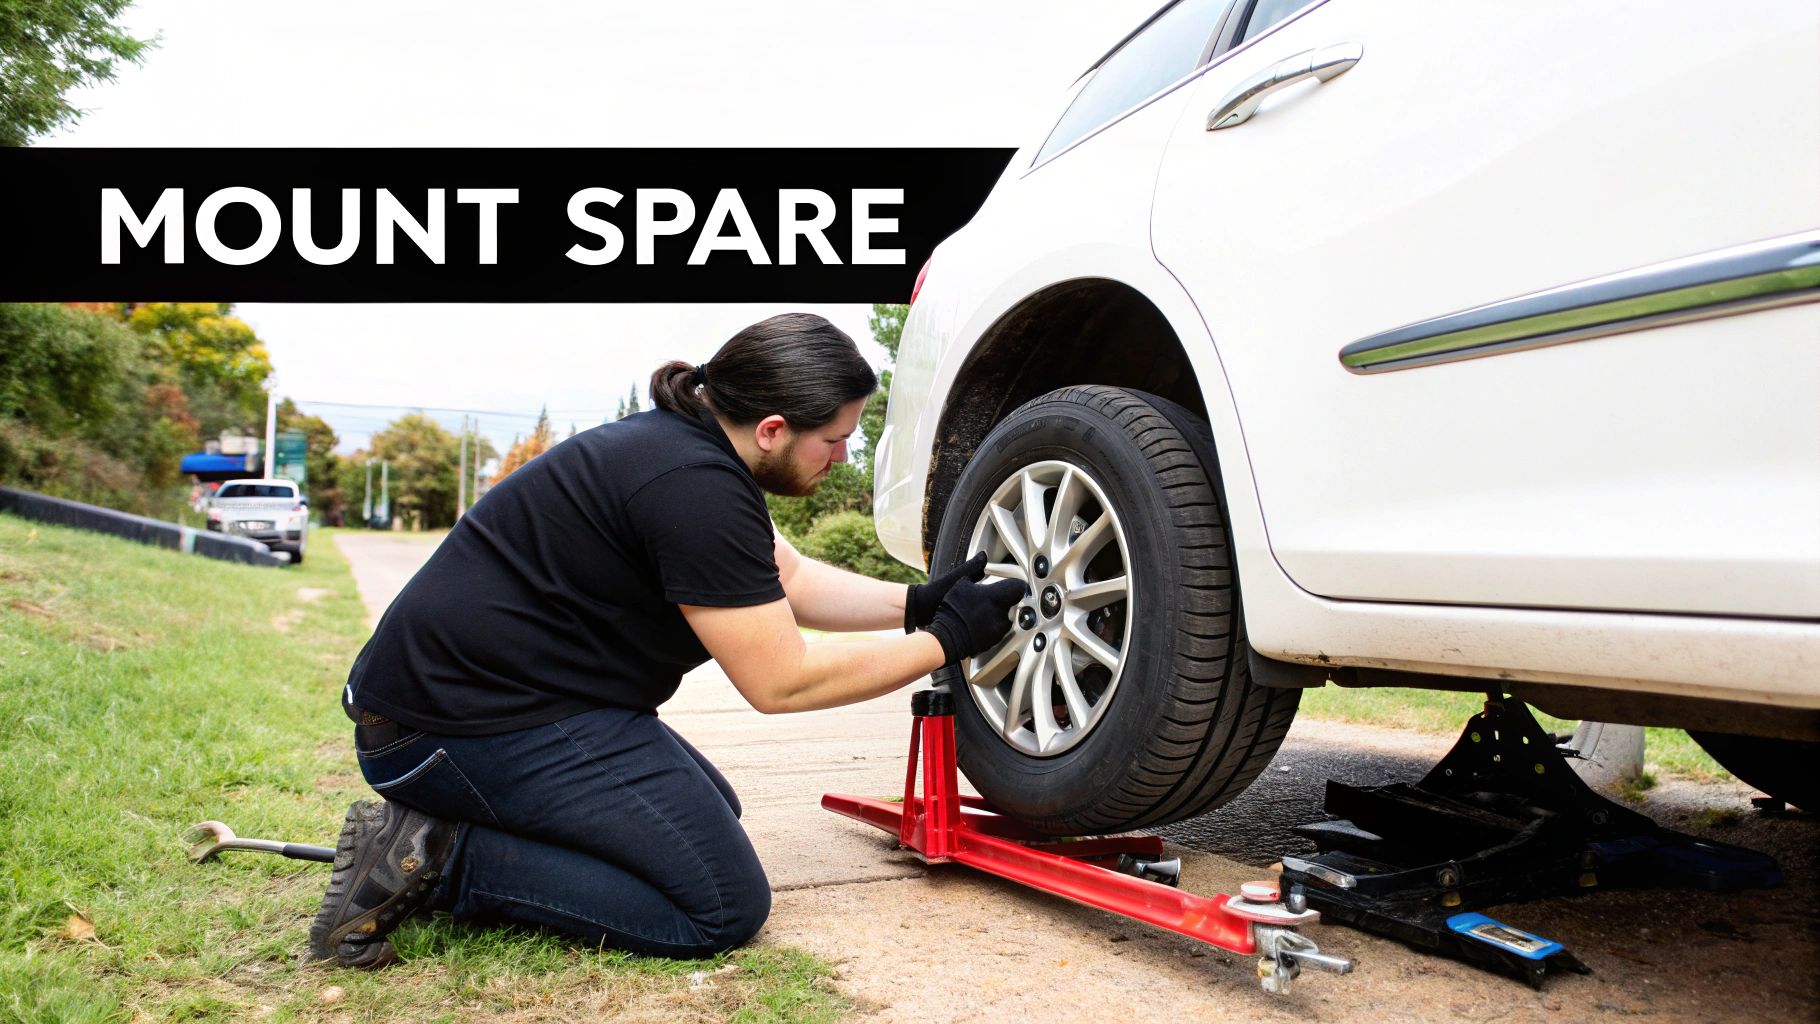
Now, grab the spare and lift it onto the lug bolts. Lining up the holes can be the fiddliest part of the whole job. My advice is to line up the top hole, thread one lug nut on by hand to hold it in place, and then you can easily pivot the wheel to get the others aligned.
A quick heads-up: most modern cars in the UK come with a ‘space-saver’ spare. It looks comically thin compared to your normal tyre, and that’s because it is. It’s only a temporary fix to get you to a garage at a reduced speed. Don’t be tempted to use it for long-term driving.
With the spare sitting flush against the hub, put the rest of the lug nuts on and tighten them by hand until they’re snug.
The Final Tightening: A Critical Step
It’s time to bring the car back down to earth. Slowly lower it until the spare tyre is just touching the ground but isn’t taking the car’s full weight yet. Don’t forget to pull the old wheel out from under the car.
Now, grab the wrench and tighten the lug nuts properly. This is where a lot of people make a crucial mistake. You can’t just tighten them in a circle. You absolutely must use a star pattern. This simple technique ensures the wheel is mounted evenly, preventing dangerous wobbles when you’re driving.
Imagine the lug nuts are points of a star:
- Tighten the first nut firmly.
- Move across to the nut directly opposite it and tighten that one.
- Go to the one next to where you started.
- Then move to its opposite.
- Keep going in this star-shaped sequence until all the nuts are tight.
Once that’s done, lower the car completely, remove the jack, and give each nut one last firm check with the wrench. All that’s left is to pack away your tools and the flat tyre. Now you’re ready to get back on the road—just remember to drive cautiously, especially on a space-saver, until you can get your original tyre sorted.
Driving on a Spare and Arranging a Repair
So, you’ve done it. The old, flat tyre is off, the spare is on, and you’re no longer stuck on the side of the road. That feeling of relief is brilliant, but don’t get too comfortable just yet—the job isn’t quite finished.
Most cars you see on UK roads, from the motorways around Newcastle down to the streets of London, are kitted out with a temporary “space-saver” spare. It’s that skinny-looking wheel that’s much thinner and lighter than your regular tyres. It’s built that way for a reason: it’s a get-you-home-safely fix, not a permanent solution for your daily drive.
Understanding Space-Saver Limitations
The moment you start driving on that space-saver, you need to change how you handle your car. These tyres are not designed for normal speeds or long journeys. Pushing them beyond their limits is a serious safety risk that can throw off your car’s balance, braking, and overall handling.
Here’s what you absolutely must know:
- Maximum Speed: Never go faster than 50 mph (80 km/h). You’ll usually find this limit printed right on the tyre’s sidewall in big, bold letters. It’s not a suggestion.
- Maximum Distance: Think of it as a very short-term pass. You should only drive on it for the shortest distance possible—typically no more than 50 miles—just enough to get you to a tyre shop or safely back home.
- Handling Changes: Your car is going to feel different. It won’t corner as sharply, braking will feel less direct, and acceleration will be a bit sluggish. Steer clear of any sharp turns or sudden, aggressive manoeuvres.
A space-saver has one job and one job only: to get your vehicle out of a risky spot and to a safe location where a proper repair can be done. It’s your get-out-of-jail-free card, not a free pass to carry on as normal.
Getting Your Tyre Repaired or Replaced
Your next move is your top priority: get that original tyre checked out to see if it can be repaired or if it needs replacing. A simple slow puncture from a nail might be fixable, but a massive blowout or any damage to the sidewall almost always means you’re looking at a new tyre.
Don’t put this off. Your car’s safety features, like ABS and traction control, are all calibrated to work with four matching, full-sized tyres.
Finding a reliable fitter fast is key. If you’re in a big city like Birmingham or Manchester, you’ve got options. But what if you’re somewhere unfamiliar in the UK? This is where mobile services have become a real game-changer. Instead of chancing a long, nervous drive on a wobbly spare, you can decide to have a pro come directly to you.
For example, services providing mobile tyre fitting in London can sort out a replacement right at your home or workplace. It saves you the hassle of a trip to the garage and gives you total peace of mind that the job is done right, getting you back on the road safely and without any drama.
When to Call for Professional Roadside Assistance
Knowing how to change a flat tyre is a brilliant life skill, but there are situations where doing it yourself isn’t just difficult—it’s dangerous. Deciding when to make the call for professional help is as important as knowing how to use a jack.
Changing a tyre in your quiet driveway is one thing. Being stuck on the hard shoulder of the M6 with lorries hurtling past at 70 mph is another world entirely. Your safety has to come first.
Imagine it’s chucking it down with rain in Manchester, night is falling, and you’re on your own. Or maybe you’ve done everything right, only to find the locking wheel nut key is missing. These are the moments when calling for help isn’t giving up; it’s making the decisive, smart choice that solves the problem.
UK Roadside Assistance: Subscription vs On-Demand
For decades, UK drivers have relied on subscription-based breakdown services. You pay an annual fee to providers like The AA, RAC, and GreenFlag. The alternative is a modern, on-demand solution. Let’s compare them to help you decide which is the right buying choice for you.
- The AA, RAC, and GreenFlag (Subscription Model): These are the traditional players.
- Pros: They offer peace of mind with year-round cover for a fixed annual fee. The AA and RAC use their own branded patrols, which many drivers trust. GreenFlag uses a network of local garages which can sometimes mean a faster response.
- Cons: You pay the subscription fee whether you use the service or not. Cheaper policies often have significant limitations on call-outs or tow distances. During peak times, you can face long waits, leaving you stranded for longer than necessary.
- Crisfix App (On-Demand Model): This is the modern, pay-as-you-go alternative.
- Pros: The primary advantage is cost and control. You only pay for help when you need it, with no annual membership fees. The app connects you to a network of vetted, local professionals across the UK, from London to Liverpool, often resulting in faster response times than a single national patrol fleet. You get a fixed, upfront price, so there are no surprises.
- Cons: If you are a driver who experiences multiple breakdowns per year, the total cost could potentially exceed an annual subscription fee.
Making the Decisive Choice
Your decision depends on your needs. For drivers who want to avoid annual fees and prefer the transparency and speed of paying only when a problem arises, an on-demand app is a fantastic, modern solution.
| Service Provider | Model | Decisive Factor (Pros) | Potential Drawback (Cons) |
|---|---|---|---|
| The AA / RAC | Subscription | All-inclusive cover and brand familiarity. | Annual cost, potential for long waits during peak periods. |
| GreenFlag | Subscription (Network) | Potentially faster response via a network of local garages. | Service quality can vary between different third-party contractors. |
| Crisfix App | On-Demand | No annual fees, upfront pricing, fast local help, and user control. | May be less cost-effective for drivers who break down multiple times a year. |
Ultimately, choosing an on-demand service like the Crisfix app puts the power back in your hands, connecting you with professional roadside assistance that is ready to solve your specific problem, right now.
Still Got Questions About Changing a Tyre?
Even after reading a guide, it’s natural to have a few more questions. After all, dealing with a flat tyre for the first time—especially on a drizzly Tuesday morning in Liverpool—can feel daunting. Let’s tackle some of the most common things UK drivers ask.
How Long Should It Actually Take?
If you’ve done it before, you can probably get a tyre changed in about 15 to 30 minutes. But if it’s your first time, it’s dark, or the rain is pouring down, give yourself up to an hour. Rushing is how mistakes happen. Your priority is staying safe, not breaking a speed record.
What if the Wheel Nuts Are Stuck Solid?
This is an incredibly common headache. Garages often use high-powered air wrenches that tighten nuts far more than you can undo with the basic wrench in your boot. You can try using your foot to apply slow, steady pressure to the wrench for extra leverage, but do not jump on it.
If a nut just won’t give, it’s time to stop and make a decision. Forcing it is a fast way to strip the nut or, worse, injure yourself. This is the perfect moment to call in professionals. A service like the RAC or an on-demand app like Crisfix will have the proper tools to get it loose without any drama.
Can I Just Drive on the Flat Tyre to the Garage?
In a word: no. Driving on a completely flat tyre, even for a short distance to a garage in London or Manchester, is a terrible decision. It doesn’t just ruin the tyre—it will chew it up completely, likely damaging the expensive metal wheel rim underneath. More importantly, it wrecks your car’s ability to steer and brake safely.
The only exception? If you absolutely must move the car a few feet to get it out of a dangerous spot and onto the hard shoulder. Otherwise, stay put.
When you’re up against a stubborn nut or just don’t feel safe doing it yourself, making the decision to call for help is the smartest move you can make. For fast, reliable assistance without needing a membership, download the Crisfix App and get a local expert on the way in minutes.